Kaleidoscope effects are visually appealing styles that are used in photography, graphic design, digital art, and filmmaking. I’m sure you’re familiar with tubes that you can look through an eyehole, and when you rotate them, you can see symmetrical patterns of colors. They're eye-catching and work great as background images.
In this tutorial, you’ll learn to create a kaleidoscope effect in Photoshop. Two methods: manually crafting the effect with Photoshop and a quick and effortless way with Boris FX Optics.
Let’s dive in!
What is the Kaleidoscope Effect in Photoshop?

Inside a physical kaleidoscope, there are two or more mirrors tilted at certain angles, which cause repeated reflections of the other elements inside the device, such as colored glass or paper. These patterns created in the kaleidoscope are captivating and often used to entertain children and adults alike.
In digital photography, video editing, and graphic design, the kaleidoscope effect recreates this attractive, hypnotizing, and abstract style to add an element of surrealism and dream-like quality to the sequences and images.
Creating a kaleidoscope effect in Photoshop and other photo editing software is easy when you understand how the traditional kaleidoscope works. You need colored items and mirrors placed at different angles. All these things can be simulated in software, which is what I’m going to show you in this tutorial.
Kaleidoscope Effect in Photoshop Step by Step
In this first part of the tutorial, you’ll learn how to create a kaleidoscope effect in Photoshop manually. It's a bit time-consuming, but the results are always great.
-
Step 1: Choose Your Photo
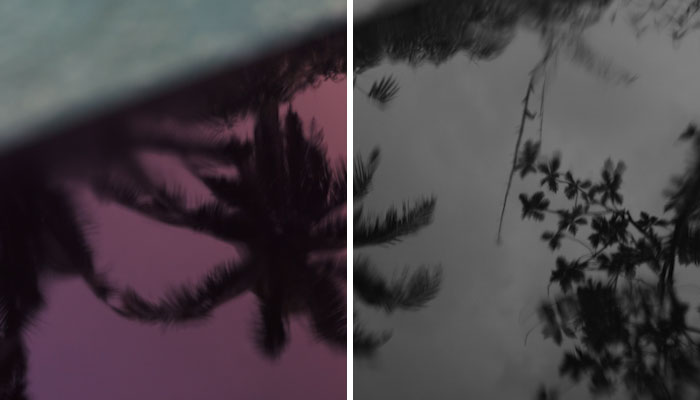
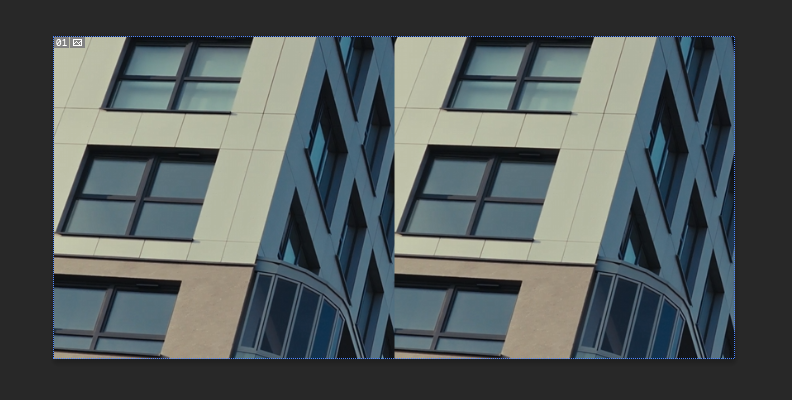
Pick a photo to be the main source of the kaleidoscope pattern. You can use any image to create the kaleidoscope effect. However, floral and architectural images result in very eye-catching kaleidoscope effects. Just remember, the "busier" the image, the more chaotic the final edit.
For our example, we'll be using the image below:

Try to use an image with vibrant color or edit the photo using the Hue/Saturation, Levels, or Curves adjustments before starting to define the patterns.
-
Step 2: Open an Image in Adobe Photoshop
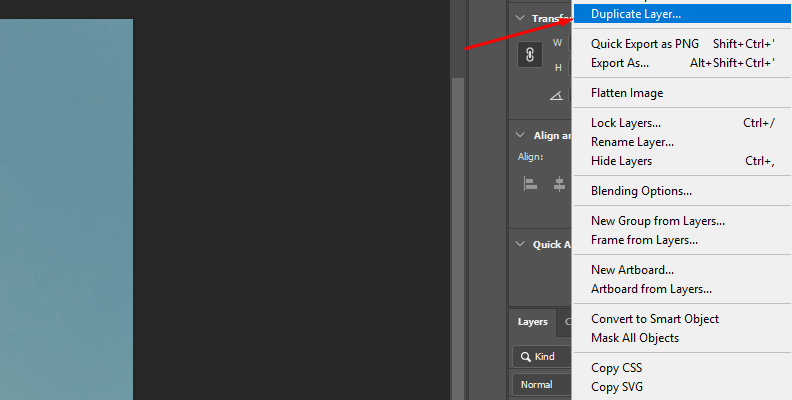
Create a new Photoshop document with your image and duplicate the background layer with CTRL+J (Windows) or CMD+J (Mac).
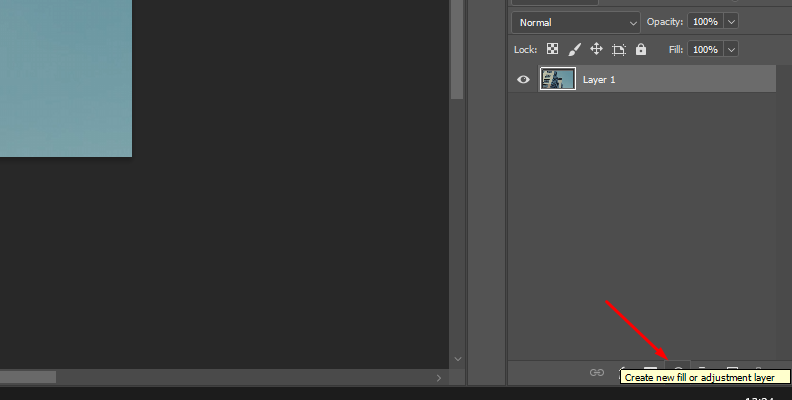
If you need to make color adjustments, this is the moment to do it. Add an adjustment layer to adjust Hue/Saturation, Curves, or any color adjustment you require.
-
Step 3: Crop the Image
Let’s start creating the pattern that will be the base for the kaleidoscope effect. Select the Rectangular Marquee Tool and choose the Style dropdown menu in the Options bar to choose Fixed Ratio.
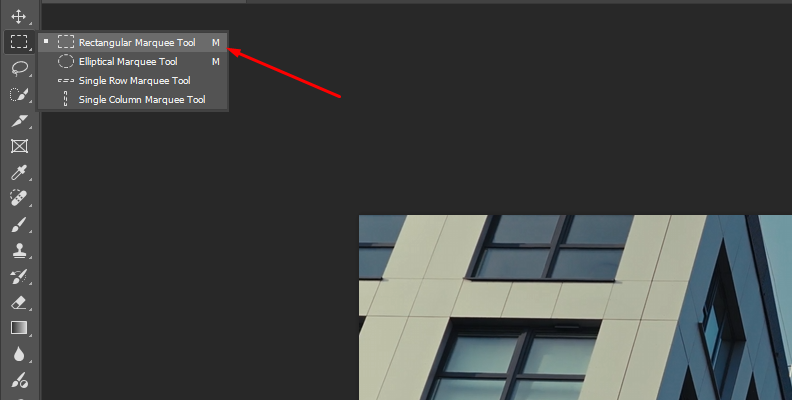
Then, ensure the Width and Height values are 1. This will ensure the images stay square.
Now, click and drag using the Rectangular Marquee Tool on the area of the image you want for the pattern.
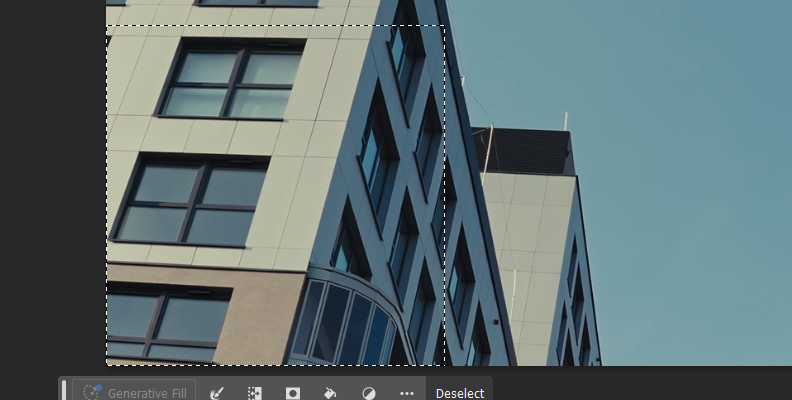
A quick tip here. If there’s a part of the image you want busier, you can use the Clone Stamp tool to clone objects or color areas. For example, if you pick an image with flowers but there are a few empty spaces, you can fill them by cloning the flowers.
Once you have the selection, press the C key to bring up the Crop tool. Press Enter (on Windows) or Return (on Mac) to make the crop and press it again to trim the rest of the image.
-
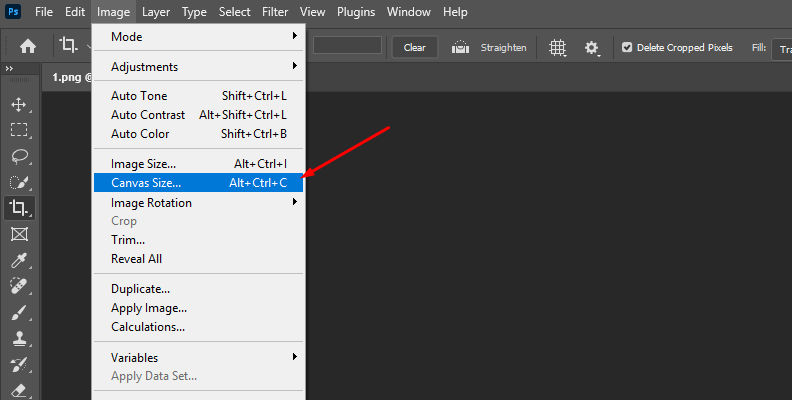
Step 4: Modify the Canvas Size
You should have the square image that will form the patterns for your kaleidoscope effect. Select the layer and go to Image > Canvas Size.
Under New Size Options in the pop-up window, change the units to Percent. Then, change just the Width values to 200%.
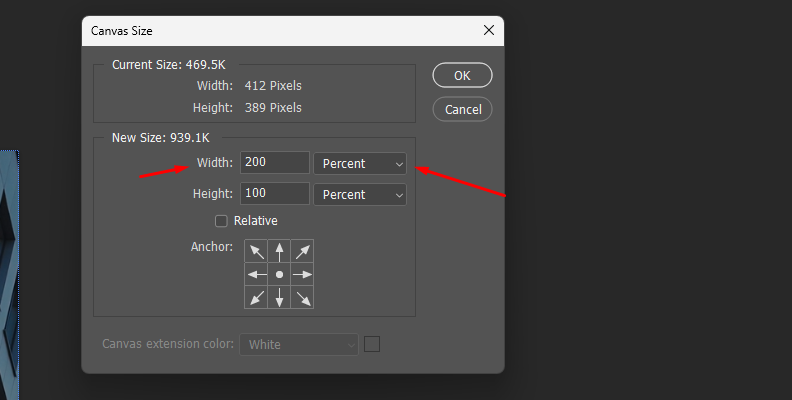
Under Anchor, click the left middle arrow to align the image to the left side of the canvas and leave the right area of the canvas blank.

Click OK to exit the pop-up window and duplicate the layer with CTRL/CMD+J.
Select the duplicate layer and drag the image to the right side of the canvas, ensuring to align it perfectly with the edges to avoid white spaces. You should have two copies of the image side-by-side.
-
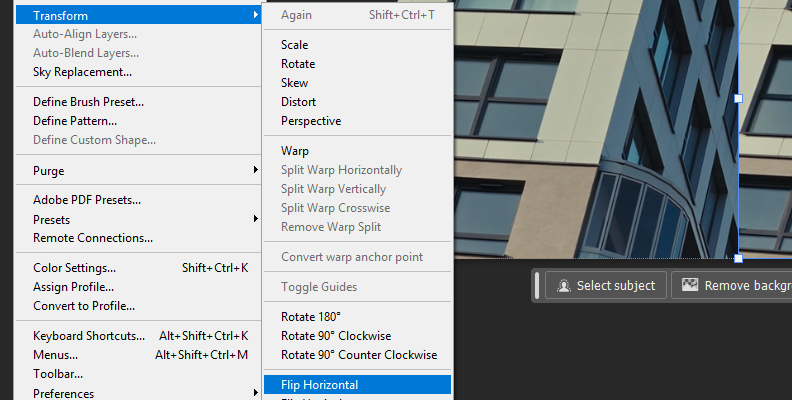
Step 5: Create a Mirror Effect
The next step is to add a mirror effect to begin creating the kaleidoscope look. Select one of the layers and go to Edit > Transform and choose Flip Horizontal.
Select the two layers and press CTRL/CMD+E to merge the two layers into one.
Now, you need to expand the height of the canvas to complete the pattern. Go to Image > Canvas Size.
Change just the Height values to 200 percent and click the top middle arrow to move the image to the top and leave the bottom part of the canvas blank, so you can mirror the image.
You can either have the image on top or bottom, depending on what you want the center of the kaleidoscope effect to look like.
Duplicate the layer and drag the image to the bottom part, aligning it to the edges. Then, go to Edit > Transform and this time select Flip Vertical to mirror the bottom with the top image.
Select the two layers and merge the layers with CTRL/CMD+E. The kaleidoscope effect is taking form, but there are still a few things to do to add more style.
-
Step 6: Rotate Layer
Duplicate the layer and go to Edit > Transform. Here, you can experiment with rotating the layer 90° either clockwise or counterclockwise, depending on the image, to find the look you like the most.
-
Step 7: Change the Blend Mode
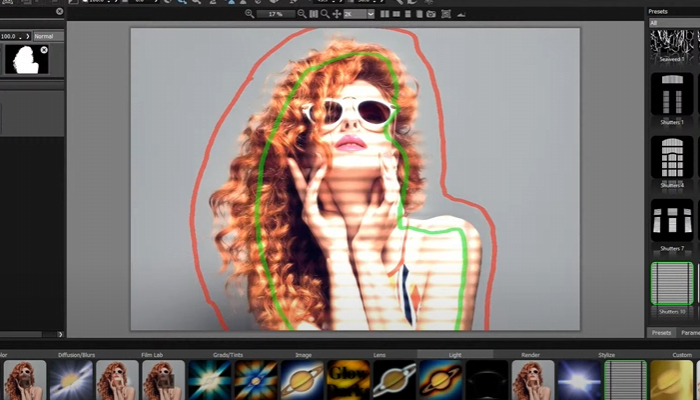
Go to the Layers panel and change the blend mode to give a more psychedelic feel to the kaleidoscope effect. You can experiment with any of the blending modes for different images. The blend modes that never fail are Light, Screen, and Overlay. You can duplicate the layer to add a second blend mode to enhance the kaleidoscope effect.
Kaleidoscope Effect in Photoshop with Optics
Boris FX Optics is an Adobe Photoshop and Lightroom plug-in that streamlines the process of creating a kaleidoscope effect in Photoshop. Optics is more than a simple plug-in. It’s a full-featured photo editing powerhouse capable of working independently as a standalone app or as a plug-in, providing you more flexibility for various workflows.
Optics comes packed with a plethora of Hollywood-grade effects, filters, and presets that make the editing process quicker and effortless.
Download the Boris FX Hub, install Optics, and unlock a 14-day free trial to test all its features, including the kaleidoscope filters. You can follow this tutorial using your free trial.
-
Step 1: Set Up Your Photoshop Project
Find a nice and suitable image to create the kaleidoscope effect in Photoshop. When picking an image, visualize how it would look as a kaleidoscope image. The great thing about Optics is that the process is so quick that you can try different images in less time than the manual method, using only Photoshop tools.
Create a new document with your photo and duplicate the layer.
If you wish to make a color correction to the image to make the colors pop, this is the time to do it. You can also wait and make these adjustments with Optics.
-
Step 2: Add Optics to the Duplicate Layer
To use Optics, it's best to apply it to the duplicate layer. First, convert the new layer to a smart object. Right-click on duplicate layer and select “Convert to Smart Object.”
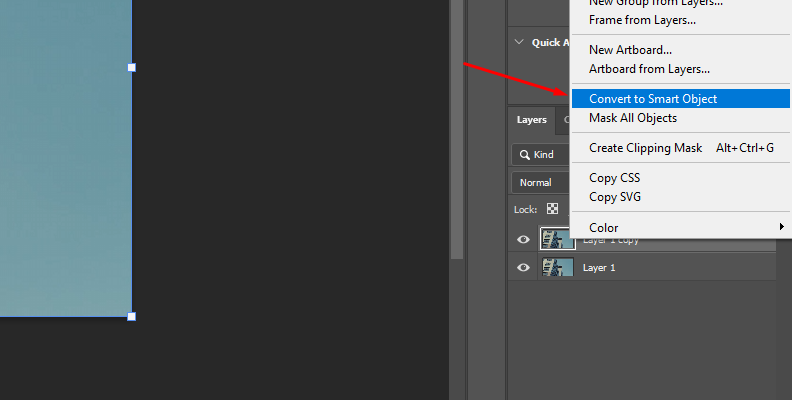
This step will allow you to go back to edit the Optics filter to modify the kaleidoscope effect or to add more filters.
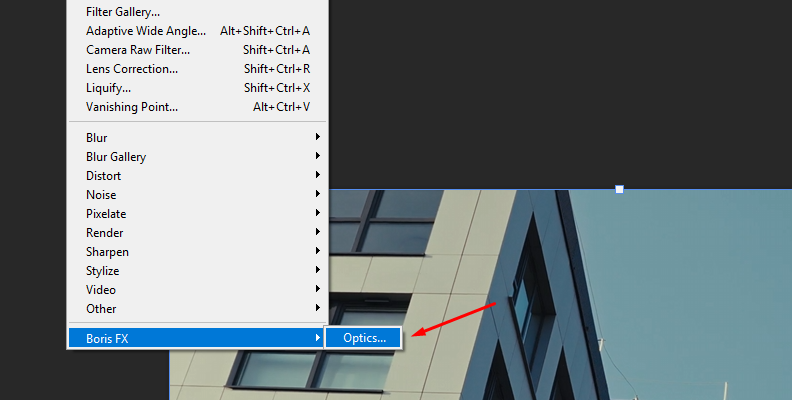
Go to Filters and then find Boris FX > Optics to apply Optics to the layer, launching its user interface in a separate window. The rest of the work will continue in the Optics workspace.
-
Step 3: Optics Kaleidoscope Filter
In Optics, your image will be imported and create a duplicate layer in the layers panel, leaving it ready to apply a filter. Below the viewer window is the Filter’s library. Click the magnifying glass icon to search for a kaleidoscope effect or navigate to the Stylize tab, where you can find the main kaleidoscope filters taken from the Emmy award-winning Boris FX Sapphire that are bundled with Optics.
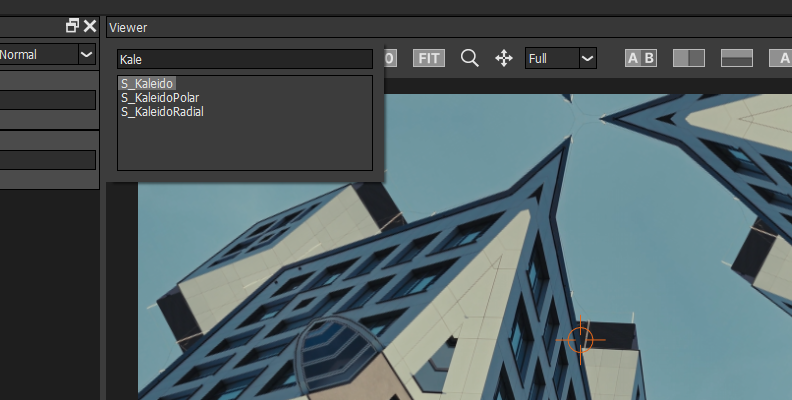
The three kaleidoscope effects are:
-
S_Kaleido: It creates reflections of the image into one of the four kaleidoscope patterns: diamonds, octagons, squares, and triangles. You have control over the center, scale, and rotation of the final image, as well as before reflecting into the kaleidoscope effect. It also provides a crop function to select which part of the image to create the kaleidoscope look.
-
S_KaleidoPolar: This filter warps your image around in a disk shape reflecting radially, simulating looking through a reflective cylinder like a kaleidoscope. This filter provides full control over scale, rotation, and stretch of the final result, and shift and crop of the image before the reflection. You can also adjust the amount of the warp distortion that creates the kaleidoscope effect.
-
S_KaleidoRadial: It simulates a traditional kaleidoscope of two to three mirrors. It results in pieces of the image reflected between the mirrors, and the mirrors create infinite copies of them. You can adjust the center, scale, and rotation before and after the effect, as well as the kaleidoscope distortion. You can also set the kaleidoscope position without rotating the image, simulating the movement of a physical kaleidoscope to get different patterns.
They can produce similar results, but each one has its unique perks and parameters you can experiment with to achieve exceptional kaleidoscope looks. Also, each of these filters features presets that can help you create the kaleidoscope image in just a few clicks.
It's also possible to combine one or more of the kaleidoscope effects and play with the blend mode to create unique patterns. With Optics, there are no limits!
-
-
Step 4: Apply the Kaleidoscope Filter
I’ll guide you through the S_KaleidoRadial filter, since that’s the one that produces a more traditional kaleidoscope look out of the box. Simply click the S_KaleidoRadial filter from the Filters library to apply it to the current layer in the layers panel.
-
Step 5: Kaleidoscope Effect Settings
Once you apply the filter, its parameters will appear on the right side of the Optics workspace, and the presets will be under the layers panel to your left.
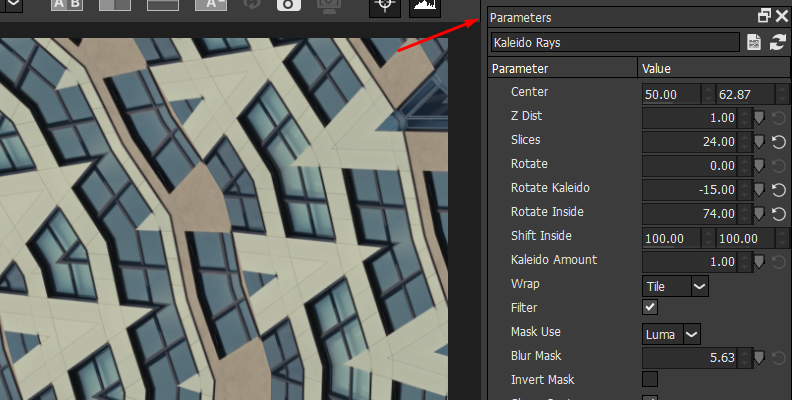
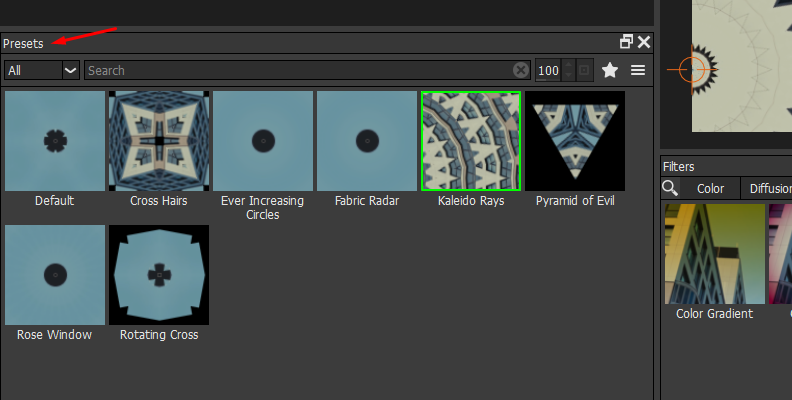
Click on a preset to apply and preview it. All presets are fully customizable from the parameters panel, so if you don’t quite like the result, you have all the options available to make it look how you want it.
S_KaleidoRadial automatically creates a nice kaleidoscope pattern with the default settings and the presets.
Here’s what you can adjust to make the kaleidoscope effect:
-
Change the center of the final image with the “Center” control.
-
Use “Z Dist” to zoom in and out from the center of the image to make the effect look wider.
-
Select the number of slices to reflect. The more slices, the more abstract the kaleidoscope effect.
-
Use the rotation settings to change the angle of the kaleidoscope. “Rotate” rotates the whole image from the Center. “Rotate Kaleido” rotates the kaleidoscope effect but not the original image. “Rotate Inside” rotates the image under the kaleidoscope effect.
I encourage you to experiment with the settings, presets, and other Kaleido effects included in Optics.
-
-
Step 6: Save Changes and Export Image
To save the changes in Optics, simply click the Apply button at the bottom right of the Optics UI. You’ll be back in Photoshop, ready to export the image to your computer and use your new kaleidoscope image for your photograph projects.

Final Words
When you have limited time, Optics is here to provide an easy and quick solution with professional-looking tools, from making quick color adjustments to creating fascinating kaleidoscope effects for your images.
Claim your 14-day free trial of Optics today!