Adobe Premiere Pro is a versatile video editing tool popular both amongst amateur and professional editors.
When it comes to editing, there's a long list of elements you can add (or remove) to your content to make it suitable and enjoyable for your target audience. In many cases, one of those elements is the blur effect.
Whether as Gaussian blur, motion blur, directional blur, fast blur, or some of the other "forms" that the blur effect can come in, it's undoubtedly one of the most frequently used tools in both creative and technical edits.
If you want to learn how to apply blur in Premiere Pro, this guide will cover everything you need to know from the moment you add the video clip into Premiere Pro, all the way to exporting it with the blur effect added.
So, without further ado, here's what you need to know about blurring videos or parts of
them in Adobe Premiere Pro.
How to Blur a Part of a Video in Premiere Pro

When it comes to applying any effect, like a video background blur or a Gaussian blur effect, you need to be familiar with the software's tools so that you can choose whether to apply them to the whole video or just specific parts of it.
For example, in Premiere Pro, you need to use masking tools so that you can isolate only a specific area in your video clip to apply the blur.
Here's how you can do this without any previous experience:
-
Add the Blur Effect
First, import your footage into Premiere Pro and place it on the timeline. If you haven't already, create a new project first.
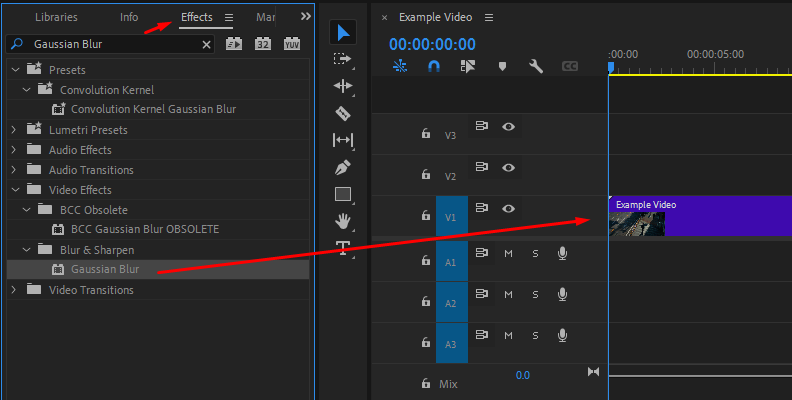
Then, open the Effects panel and use the search bar to find a blur effect such as Gaussian Blur (the most commonly used for this purpose), Directional Blur, or Camera Blur. You can apply a Gaussian blur to your video by simply dragging the effect over your clip while it is placed on the timeline panel.
-
Mask the Area to Blur
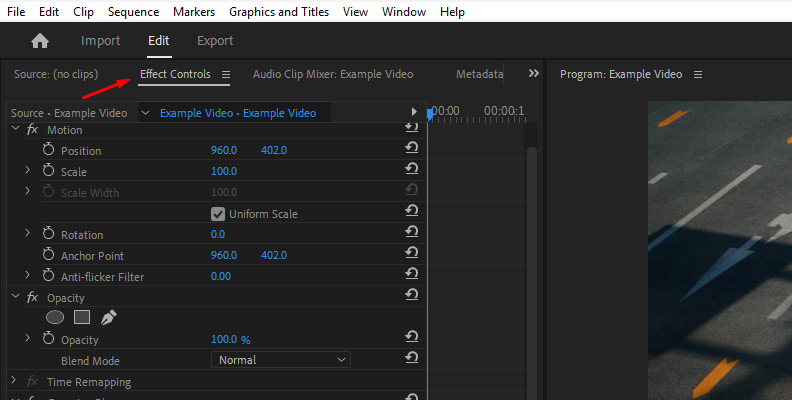
With the clip selected, go to the Effect Controls panel.
Under the blur effect, you will find masking tools, including an ellipse for circular areas, a rectangle for square or rectangular areas, and a pen tool for drawing custom shapes, which usually works best for a moving subject.
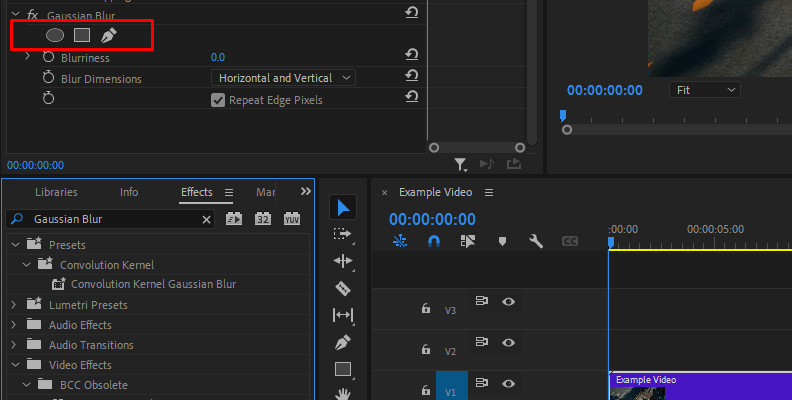
Choose the appropriate masking tool and position or resize the mask over the exact area you want blurred.
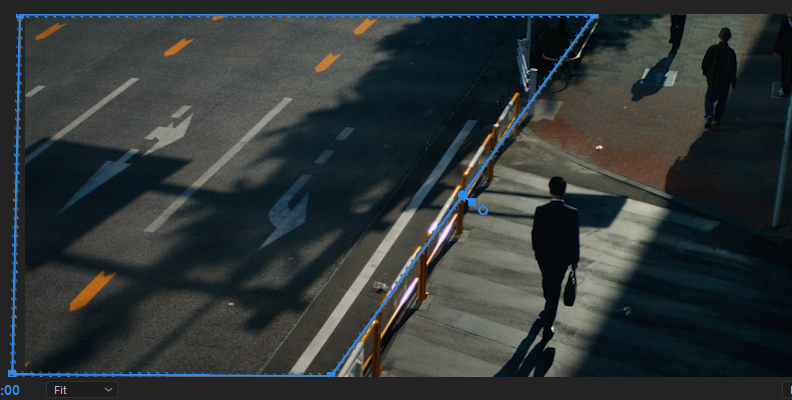
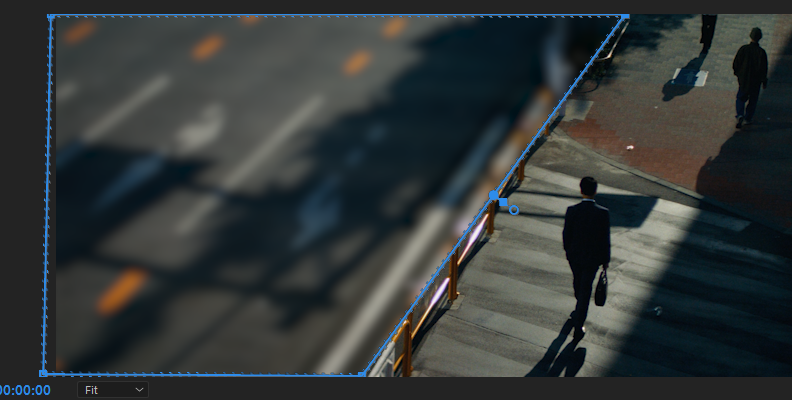
For this specific example, we used the free draw bezier tool. You can choose the rectangle when blurring things such as license plates, or the ellipse to blur faces.
Anything works to hide sensitive information; just some tools are better than others in specific cases.
Once you click the free draw bezier tool, you will notice your selection tool's look change into a pen.
-
Adjust the Blur Amount
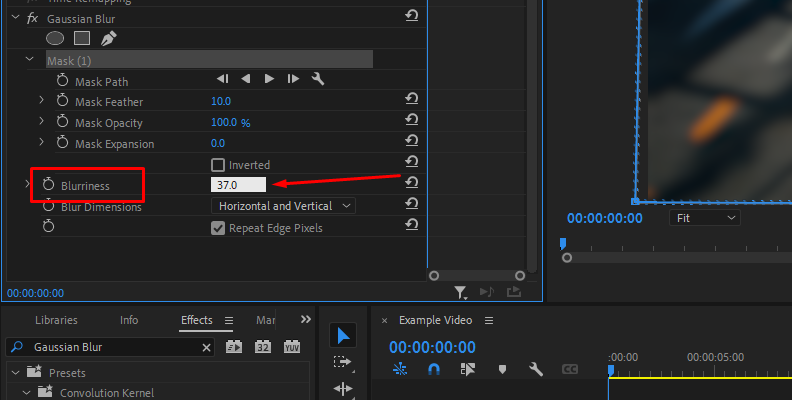
Increase the Blurriness setting of the Gaussian Blur (or the equivalent in other blur effects) until the area is sufficiently hidden.
To avoid dark or unwanted borders around the mask, enable the Repeat Edge Pixels option.
-
Track the Movement
If the subject you are blurring moves across the frame, you will need to track the mask. In the Effect Controls panel, under the mask options, you will find buttons to track the selected mask forward or backward through the timeline.
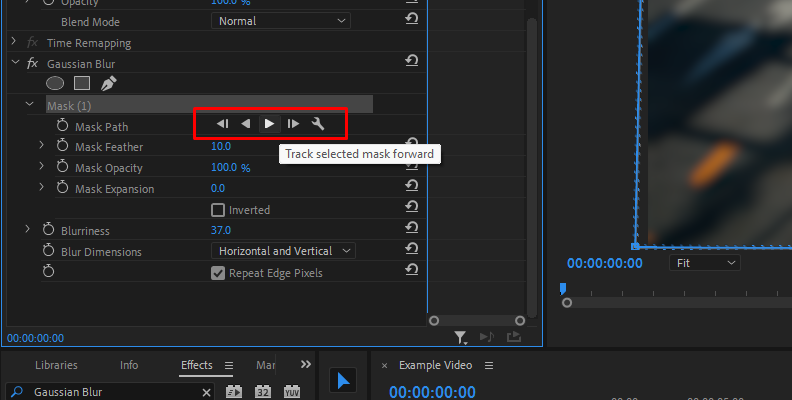
Premiere Pro will analyze the clip and move the mask automatically. Click the play icon to preview, and if the tracking is not perfect, you can adjust the mask manually by editing keyframes along the timeline.
-
Feather the Mask
To make the blurred area blend naturally into the rest of the footage, increase the Mask Feather value.
A feather setting of around 20 to 50 pixels usually works well, but you can adjust this depending on the resolution of your video and the softness you want. This is usually a must as it prevents hard edges from breaking immersion when you are adding blur effects, so feel free to experiment with different values until you find the desired level.
-
Review and Fine-Tune
Scrub through your video to check that the blur stays in place and fully covers the intended object or area. If necessary, refine the mask path, adjust feathering, or tweak the blur value until you achieve the desired effect.
-
Pro Tip
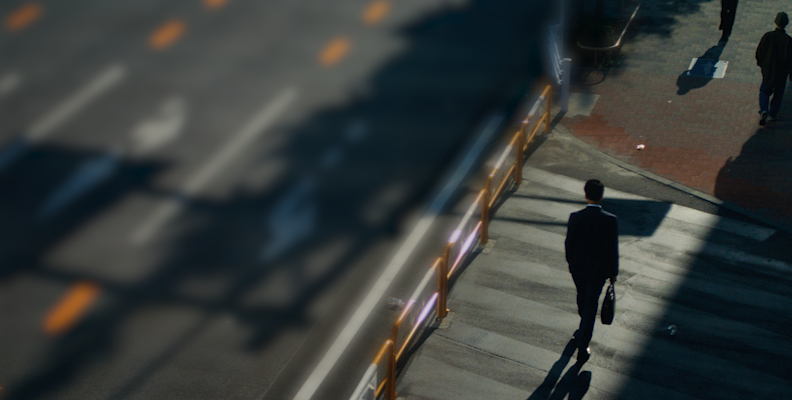
If your goal is the opposite, blurring the entire video except for one part, you can achieve this by enabling the Invert Mask option under the Mask Expansion category, as shown in the image below.
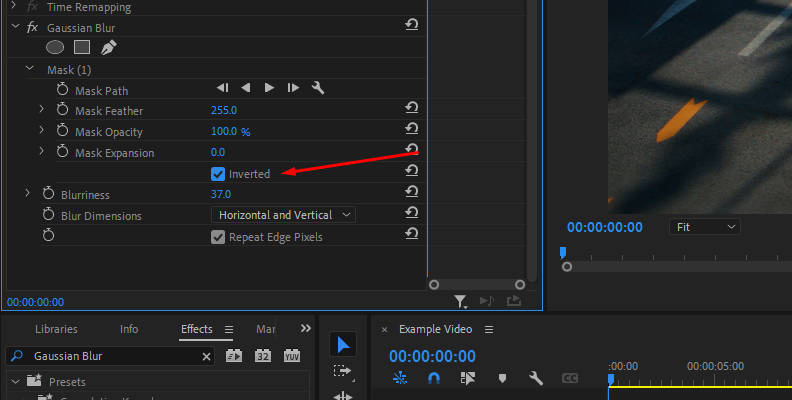
This will apply the blur everywhere outside the selected mask shape while keeping the inside sharp, as you can likely immediately notice in your program monitor window on the right.
Feel free to experiment with other blur settings as well, as not all methods will work the same for all types of content. Also, you can consider using an adjustment layer so that you can make changes and apply video effects to it instead of your original video file.
How to Blur a Part of a Video Using Continuum by BorisFX
Sometimes, as a user, you don't like the built-in tools of a specific software, or you simply find them way too time-consuming for simple tasks. That is a very understandable experience as a "casual" user or editor, as these tools are built to be very versatile and for many different tasks, but that takes away their ability to directly "fix" something in your video with a single click.
Luckily, there are lots of plug-in products that you can install for such popular video editing programs that do a much better job of completing a specific task for you in just a few clicks.
Boris FX Continuum is one of the most comprehensive plug-in suites for Premiere Pro and includes dedicated tools for blurring, pixelation, adding a blur transition, and even advanced features like Mocha masking and tracking.
With the integrated Mocha planar tracker, you can isolate moving objects much more accurately than with Premiere’s native mask tracker.
Aside from the topic of blurring or pixelating, Continuum offers hundreds of different effects, looks, and tools that you can also use to create a smooth transition in your videos, as well as change the look and feel of your entire clip.
Continuum also offers specialized effects like "BCC Gaussian Blur," "BCC+ License Plate ML," and "BCC+ Witness Protection," which are specifically designed for hiding faces and license plates with AI powered automatic motion tracking.
Also, Continuum is available for all popular video editing programs, meaning you can use it in Adobe Premiere Pro, DaVinci Resolve, Avid Media Composer, Adobe After Effects, VEGAS Pro, and more.
Specifically for this task, and specifically in Adobe Premiere Pro, here's how you can use Continuum's tools to blur part of a video, whether to protect someone's identity or to add a different look to your clip.
-
Step 1: Import The Video Clip Into Your Project
Once you launch your video editor, in this case Adobe Premiere Pro, create a project (or select from your existing video projects) and navigate to the Project panel. Here, click the "Import" button and select the video clip from your disk to import it.
When the video is imported, drag and drop it onto the timeline panel.
-
Step 2: Analyze The Video And Apply The Effect
Since your video is now on the timeline, you can watch it in full-screen mode to analyze what needs to be blurred and at which particular part of the video. You can add markers at specific parts where the video's subject that needs to be blurred appears.
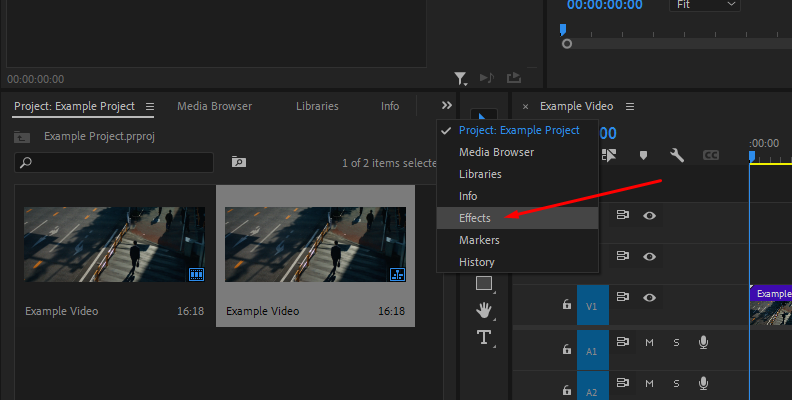
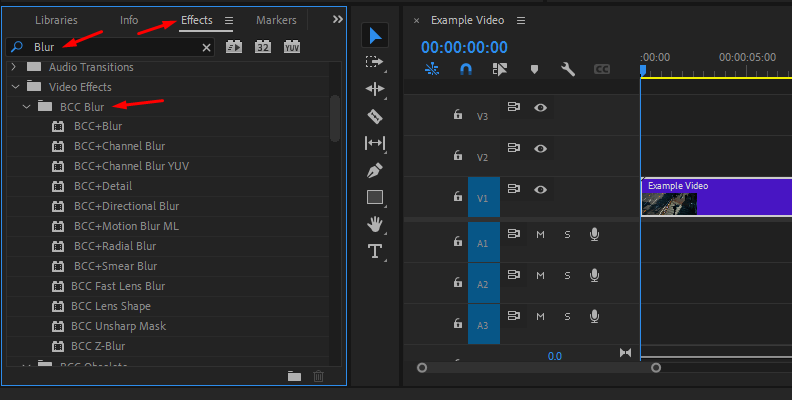
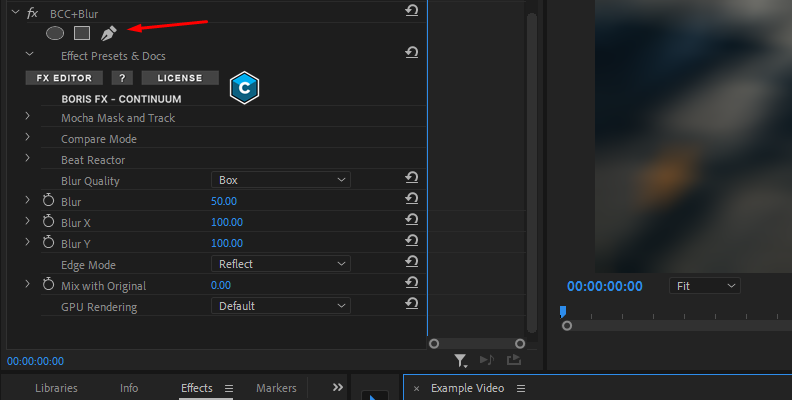
From here, open the "Effects" panel and use the search bar to find the blur you want to use. If Continuum is correctly installed for your software of choice, you should be able to see all of its available effects within the Effects panel while using the search function, as shown in the image below.
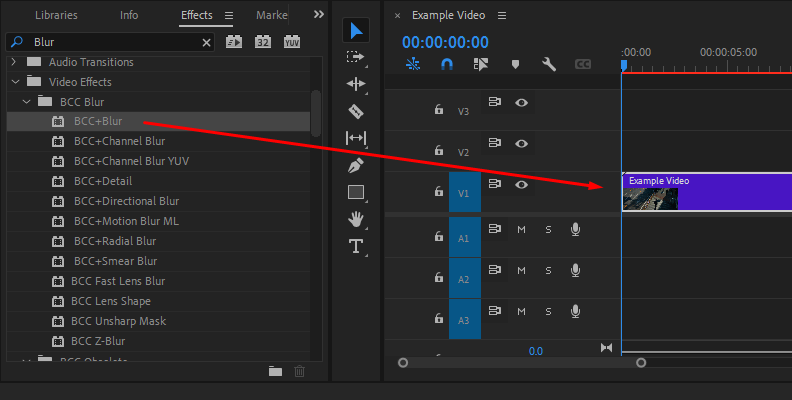
You can drag and drop the blur effect of your choice directly to your video, or if you're using an adjustment layer, with the adjustment layer selected, drag the effect over it instead.
In our case, we will use the BCC+ Blur effect.
-
Step 3: Mask The Desired Location
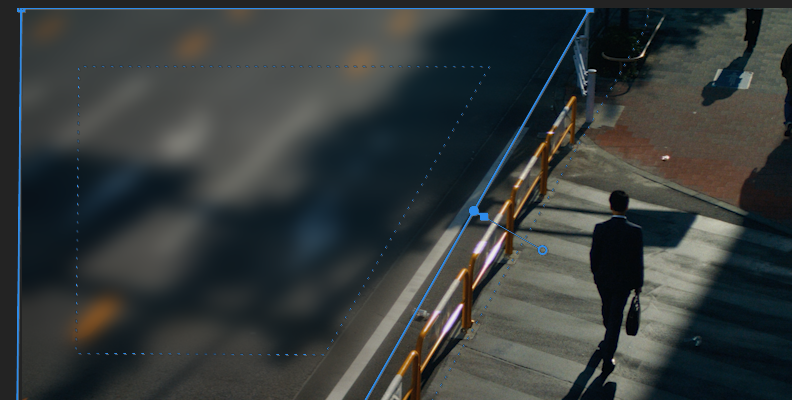
Now that you've finished analyzing your video and adding blur, it's time to select the specific spot of your clip that you want blurred.
Since Continuum is perfectly integrated into Adobe Premiere Pro, you can use the same software interface you are familiar with to choose a masking tool, as it all works within Premiere's Effect Controls panel.
-
Step 4: Choose A Preset And/Or Adjust
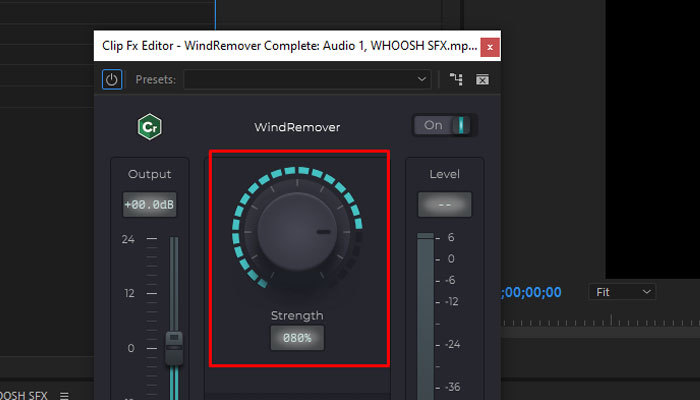
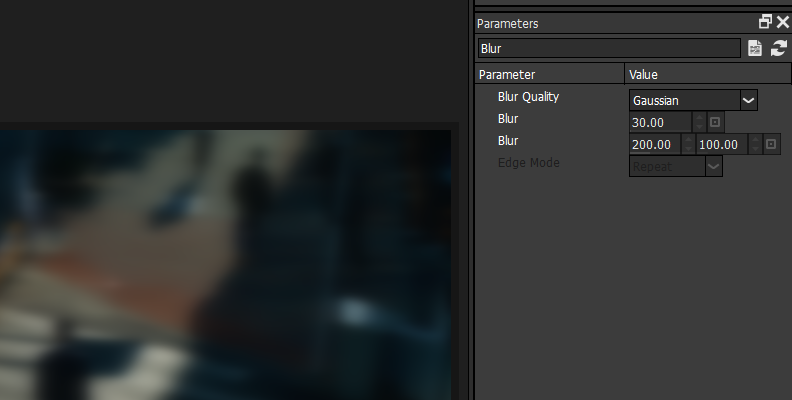
All Continuum effects allow you to choose from a number of presets once you click on the "FX Editor" button, as shown in the image below.
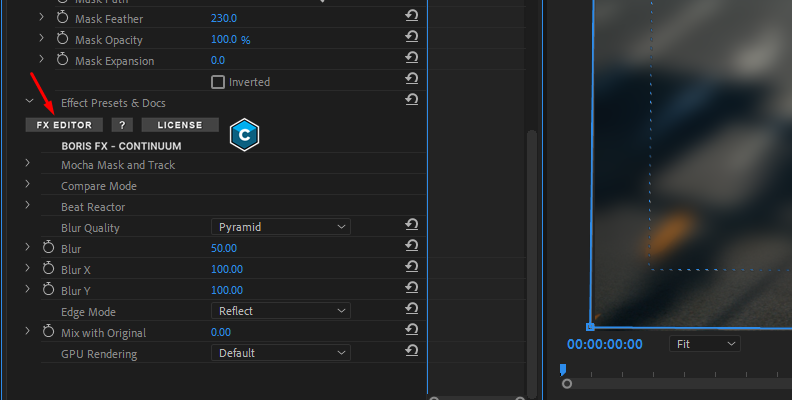
This will open up a list of presets that you can not only choose from but also adjust their parameters in case you need modifications. Creating artistic effects is very easy using Continuum.
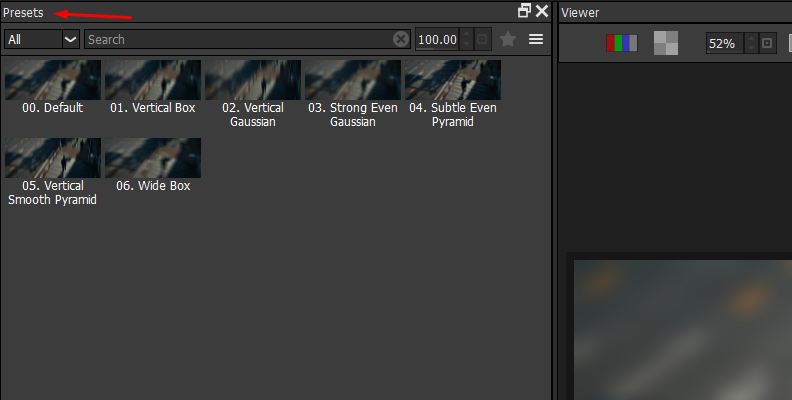
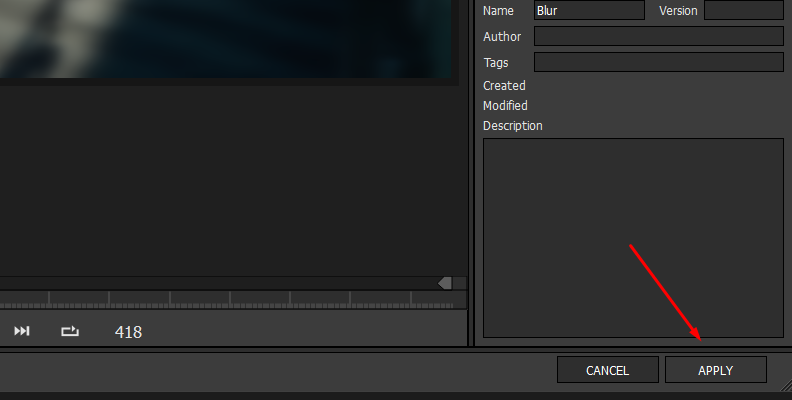
When you select a preset, you can change its values on the right.
Once you have your desired preset as you want it, click "Apply" in the bottom-right corner of the screen.
That's all you need to do!
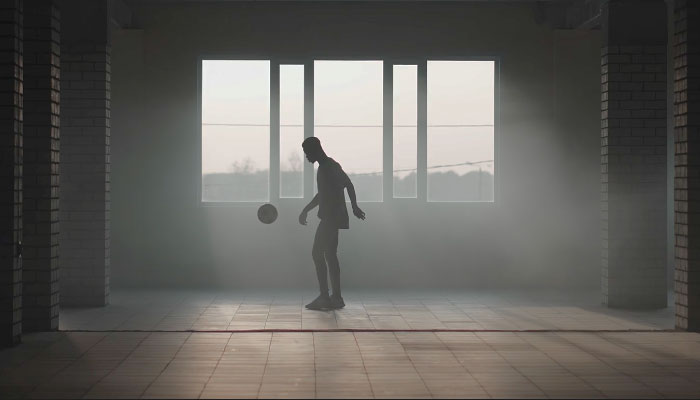
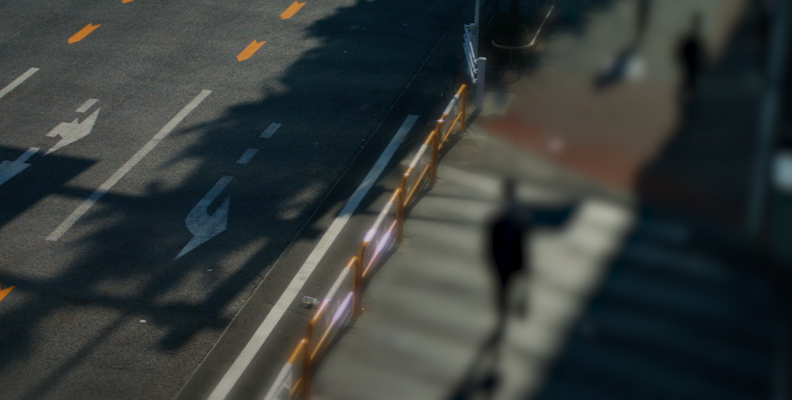
Here's how the after image turned out with just a few clicks!
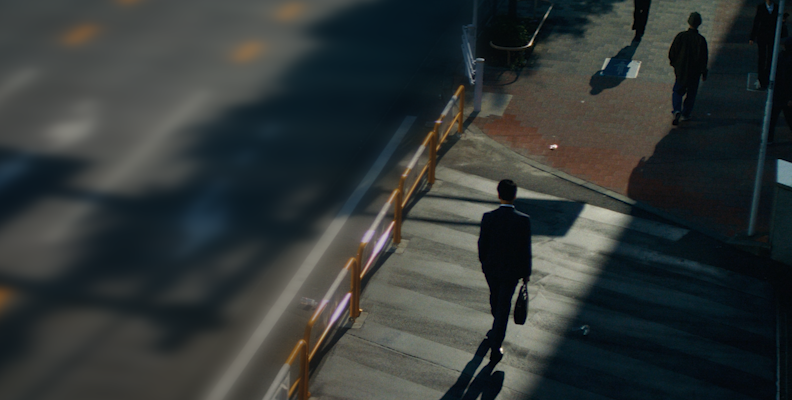
These are the key concepts for adding effects with Continuum. Once you get the hang of these, you can add many different effects, such as different types of blur, etc...
AI Tools to Use to Blur Video
AI is undoubtedly capable of helping out editors, and sometimes, when it comes to automating things, it can be of great help for tasks such as adding blur to your videos.
-
Runway ML

Runway is an AI video editing platform that offers object tracking and masking powered by machine learning. Instead of manually creating masks in Premiere, you can automatically isolate and blur faces, people, or objects with just a few clicks. The results can then be exported and brought back into Premiere for further editing.
-
Wondershare Filmora with AI Portrait

Filmora includes an AI Portrait add-on that can detect and separate people from the background. It allows you to apply blur effects directly to faces or bodies without manually masking them. While it’s more lightweight than professional suites, it’s very beginner-friendly and can save a lot of time for simpler censorship tasks.
Final Words
That covers everything you need to know about adding blur in Premiere Pro, using the built-in tools, plugins that work flawlessly within the software, as well as two automated, AI options.
Hopefully, this will help you with all your future work, and if it does, we'd be more than glad to hear it.
We thank you for reading and wish you the best of luck with your projects!
FAQ
Can I Blur a Video Background for Free in Premiere Pro?
Yes, you can blur video background for free in Premiere using the built-in tools like the blur effect and the masking tool that will help you separate the background from the foreground. Simply follow our first method, and you should have no trouble doing it.